![]()
Beautiful Plants For Your Interior
![]()
Beautiful Plants For Your Interior

How to improve your soil for gardening is the 3rd and last post in the soil post series. In my previous posts on how to find out my soil type and pH testing of soil, we found out how to determine your ‘garden soil structure’ and how to test and find out your soil’s pH.
Also, our buyer’s guide post looked at some of the best pH testers currently on the UK market; which can help you determine the pH of your soil quickly.
Hopefully, you have undertaken these ‘soil tasks’ and ‘pH tests’ and we can now move on and get down to knowing ‘how to improve your garden soil’. Let us explore the best options to correct your soil’s pH and or soil structure should it be required.
Most gardens have soil that provides something less than the ideal growing conditions for many garden plants. Perhaps it’s rocky or there is too much clay in your soil; maybe too much ‘sand’ to suit the plants you want to grow.
How best then to change your soil structure to improve your growing potential?
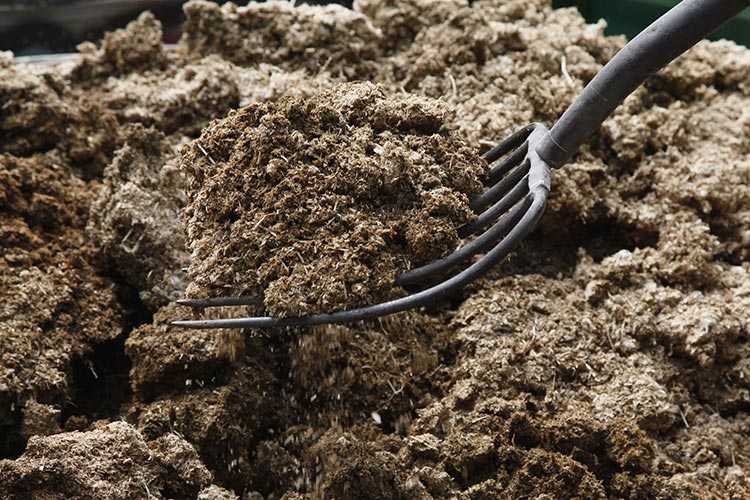
Although it can be difficult to improve a ‘soils structure’ the best way to do so irrespective of whether your soil is predominantly ‘clay’ or ‘sandy’, is to add organic matter. Yes, it is as ‘simple’ as that.
Organic matter or alternative names like soil improvers and soil conditioners are what is added to most soils to improve their structure and are derived from living things, but in chemistry, ‘organic’ means carbon-containing compounds.
Most organic matter is best rotted or perhaps a better term would be ‘composted’ before application, to ensure a good carbon/nitrogen ratio.
Many gardeners use homemade ‘garden’ compost made from both kitchen and garden waste as the ‘organic matter, which is an excellent soil improver, it’s both cost-effective and environmentally good.
Other good alternative examples of organic matter besides garden compost to improve soil structure could be:-
There are others. Sawdust or woody garden waste and straw, deplete nitrogen from the soil as they rot, so it’s best that these types of organic waste are composted first, with nitrogen-rich materials such as grass clippings.
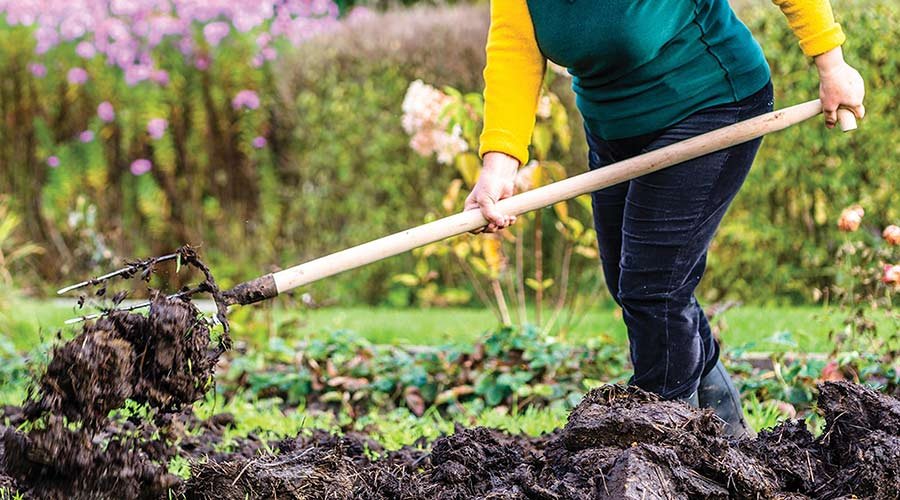
Organic matter is best described by gardeners as a ‘cure-all’ in the garden. You cannot go horribly wrong with ‘organic matter’ however it’s added to your garden. Organic matter will generally improve any soil type when ‘worked’ into the ‘topsoil’ to a depth of around 30cm (1ft).
Organic matter can also act as a good ‘mulch’ when spread over the soil’s surface. A layer of approximately 2-3 in (50-75mm) deep around plants, shrubs and trees will help with water retention and aid in the fight against weeds.
To improve your soil structure, it is recommended that you ‘work’ into your soil 5 -10kg per square metre (11-22 lbs per yard) of ‘organic matter/soil improver’, which is generally about half to one 15L (3gallon) bucket full.
The slow release of nutrients is also a characteristic of manures, composts and other bulky organic matter and is a desirable horticultural feature that leads to healthier and higher-quality plant growth.
By adding organic matter to clay soils, drainage will be improved, due to the fact the ‘organic matter’ forces the tightly packed clay particles apart, making it easier for plant roots to penetrate.
By adding organic matter to sandy soils, organic matter enters the large spaces found in sand and acts as a sponge, slowing down drainage so the soil stays moist for longer.
It is best to work in any ‘soil improvers ‘before you plant’, especially if it is a new garden. In the UK generally for most soils Spring is the best time around March or April to work in the organic matter before the growing season.
However, with ‘sandy soils’ it is best worked with a soil improver in late winter. Avoid applying improvers in late summer as the warmer soil can lead to significant nutrient loss as the organic matter will break down quickly to produce ‘soluble nutrients’ which are easily washed out (leached) by our winter rains.
If you have followed my earlier posts, you should have by this stage some idea of the current pH (pondus Hydrogenii) levels of your soil, prior to the addition of any organic matter.
It should be noted that the introduction of ‘organic matter’ into your soil will likely increase the pH of your soil in the first few weeks of introduction.
This initial increase can be caused by ‘high nitrogen plant residue’ as soil microbes further break down the plant material to ammonium, which temporarily increases pH. Slowly the ammonium gets converted to ‘nitrate’ which causes pH to go down. If the ‘nitrate’ however is lost to leaching, then pH drops even more. Generally, in the long term, microbial decomposition decreases pH.
The net effect of ‘organic matter’ addition on soil pH depends on the rate at which all these processes above occur and what happens with the ‘nitrogen’ produced (e.g., nitrate plant uptake vs. leaching loss), the quality and quantity of plant material, and your initial soil pH.
Allow your soil to stabilise over a period after the introduction of ‘organic matter’ and undertake pH testing periodically over several months to see where your pH levels lie, and determine if your soil is stabilising towards acidity or alkalinity.
Once you see some sort of stability in the pH of the soil, then you can perhaps adjust the pH of the soil further if needed but try to avoid correcting the pH unless it is necessary. It is important to monitor how the pH changes over a longer period.
If the pH value drops below pH 5 or rises above pH 8 then it is advisable to gradually start adjusting levels.
Adjustments to pH should be based on the different cultivars of plants and the optimum growing conditions you are looking to plant. Certain plants prefer more alkaline soil, while others prefer a more acidic type of soil.
Generally, though most things will grow happily at a pH of between 5.5 – 7.5.
In many areas, you will come across high pH alkaline soils, as these areas are found throughout the UK.
If after testing your original soil, and prior to adding any ‘organic matter’ or other soil improvers, soil testing results show that your soil has a pH of 7.5 and above, then you know your soil is largely made up of ‘calcium carbonate’ (limestone) and is likely very alkaline.
It is well known amongst gardeners that it is often more difficult to reduce high soil pH (reduce alkalinity) in chalky/limestone soils than it is to ‘improve’ acidic soils with a lower pH.
Alkaline soils are primarily caused by ‘calcium carbonate’ rich ‘parent’ materials that contain chalk and limestone to excess. There are some other telltale signs, that may lead you to also conclude your soil may be alkaline.
Alkaline chalky/limestone soils are often very stony, less water retentive and very dry in summer. Alkaline soils are also very often poor in nutrients like manganese and iron. Poor growth and yellowing leaves (chlorosis) are a result of plants not being able to absorb sufficient iron and manganese through their roots.
To counteract the slight effects of alkaline soils (pH7.5) the first step would be to dig in plenty of ‘organic matter’, in the top 25cm (10in) this will assist greatly with ‘water retention’ and create ‘humus‘ which is just ‘organic matter’ in the soil and derived from the micro decomposition of plant and other animal materials.
In addition to adding organic matter, you should also apply good fertilisers rich in both iron and manganese.
For more severe cases, where pH is higher than pH7.5 then large doses of ‘sulphur powder’ may be required to be added to your soil to a depth of around 30cm (12in).
Elemental sulphur is the ‘method’ most used when lowering the high alkaline pH of soil. The soil bacteria change’s the sulphur to sulfuric acid, thus ‘acidifying’ or lowering the soil pH.
Care should be taken though with the addition of high doses of sulphur and making the soil too acidic as this method can be very damaging to plants. I suggest just adding small amounts of sulphur over time. Better to do this, than risk a bigger dose all in one go.
Be prepared to monitor this method of acidification over many many months, as sulphur added to the soil does not take immediate effect.
Sprinkle sulphur over the soil to be treated at the rate required (see table below).
Do this in still weather as the dust is very fine and drifts easily. Gloves, goggles and dust masks are sensible precautions if treating larger areas.
Sulphur is best incorporated, by cultivation, into the soil in advance of planting so it has plenty of time to take effect.
Applied to the surface it can take years for the acidity to be changed at the root depth. If deep-rooted trees and shrubs are to be planted it may be necessary to dig half the dose into the soil and cultivate the rest into the surface by hoeing, raking and cultivating. A rotovator is ideal, where available.
Aproximate Sulpher to apply to soil – Grams per sq m (Ounces per sq yard) | |||
Original pH of Soil | Clay Soils | Sandy Soils | Loam Soils |
8.5 – 6.5 | 270g (9.6 oz) | 180g (6.4 oz) | 220g (8.0 oz) |
8.0 – 6.5 | 180g (6.4 oz) | 90g (3.2 oz) | 140g (5.0 oz) |
7.5- 6.5 | 90g (3.2 oz) | 40g (1.44 oz) | 80g (3.0 oz) |
7.0 – 6.5 | 20g (1.0 oz) | 20g (0.16 oz) | 10g (0.5 oz) |
If you find that your soil has a high acidic pH reading, then to take the pH levels up towards pH neutral 7.0 (dependent on your growing requirements) the addition of garden lime to the soil is commonly used by gardeners. The active ingredient in the lime is ‘calcium carbonate’.
Widely offered in garden centres ground limestone is easy to spread, using a garden spreader or evenly by hand, please ensure you wear gloves and safety goggles at all times when spreading by hand. No matter how you spread the lime, make sure that it works well into the top soil afterwards to a depth of about 20cm (8in).
There is no optimal time to lime, however, it makes sense to add lime to your soil at the beginning of the winter for any annual crops you wish to plant for the following year and just before you ‘turnover’ the soil. This will allow for the ‘lime’ to take effect over the winter months thus avoiding any damage to young growth come the spring.
Due to the time ‘lime’ takes to take effect (it could be years) when simply applied to the surface of the soil, if you want to plant perennials like lawns, shrubs, fruit or trees in a ‘new garden area’ its best to adjust the pH before sowing/planting perennials or laying of turfs.
The quantity of lime to apply to your garden soil will depend on the area and structure of your soil. For example, soils with high ‘clay’ content would require more lime added due to what is called the ‘buffering capacity’ compared to sandy soils.
In addition, the quantities used will also depend on what ‘lime’ you use. Lime has a calcium oxide neutralising value (NV) so more lime will need to be added to the soil if the type of lime used has a smaller (NV) value than another type of lime with a larger (NV) value.
There are 3 main types of lime.
Ground limestone is the recommended lime to use for gardeners. However, Dolomite Limestone can also be used on soils that lack ‘magnesium’ as it is rich in magnesium carbonate as well as calcium carbonate. Hydrated lime (calcium hydroxide), sold for use by builders, can also be used. It is a fine powder, quick-acting but caution should be used when handling it as it can cause skin and eye irritations if not handled safely (See above recommendations).
The quantity recommendations below are based on the use of ground garden lime (calcium carbonate) based on the Department for Environment, Food and Rural Affairs (DEFRA) recommendations. If you are using other limes as mentioned previously you should adjust quantities accordingly.
The lime should be worked into the top 20cm (8in) of topsoil. These recommendations are enough to raise the soil pH to pH 6.5. Which is considered the best all-around pH for the majority of garden plants.
Ground Garden Lime to apply to soil – Kilogrames per sq m (Pounds per sq yard) | |||
Original pH of Soil | Clay Soils | Sandy Soils | Loam Soils |
4.0 – 6.5 | 2.2kg (4.0 lbs) | 1.6kg (2.9 lbs) | 1.9kg (3.4 lbs) |
4.5 – 6.5 | 1.8kg (3.3 lbs) | 1.3kg (2.3 lbs) | 1.5kg (2.7 lbs) |
5.0 – 6.5 | 1.4kg (2.5 lbs) | 1kg (1.8 lbs) | 1.2kg (2.2 lbs) |
5.5 – 6.5 | 1kg (1.8 lbs) | 0.7kg (1.2 lbs) | 0.8kg (1.4 lbs) |
6.0 – 6.5 | 0.6kg (1.1 lbs) | 0.4kg (0.7 lbs) | 0.5kg (1.0 lbs) |
Compost is decomposed organic matter that has been broken down into a rich, dark material that is high in nutrients and beneficial microorganisms. Soil conditioner, on the other hand, is any material that is added to soil to improve its physical properties, such as structure, water-holding capacity, and aeration. Compost can be used as a soil conditioner, but not all soil conditioners are compost.
To rejuvenate garden soil, you can start by removing any weeds, rocks, or debris from the soil. Then, add organic matter such as compost, manure, or shredded leaves to the soil. This will help to improve soil structure and fertility. You can also add soil amendments such as lime, sulfur, or gypsum to adjust the soil pH as needed. Finally, consider rotating your crops to help prevent soil-borne diseases and pests.
Some natural ways to improve soil include adding organic matter such as compost, manure, or leaf mould to the soil, using cover crops or green manure to help improve soil health and prevent erosion, and rotating crops to help prevent soil-borne diseases and pests. You can also use natural soil amendments such as bone meal, blood meal, or fish emulsion to provide additional nutrients to the soil.
How to improve your soil for gardening, concludes our series of posts on soils. We have covered ‘soil structure’ and how to find out what your own soil type is, soil pH and how to test for it and finally how to improve your own soil based on the findings of the other 2 elements.
These 3 very important elements are critical in the preparation and growing process for any type of plant and I urge you to follow along carefully if you want to reach your growing potential.
You may also look at our FAQ section to seek answers concerning other aspects of your garden and gardening.