![]()
Beautiful Plants For Your Interior
![]()
Beautiful Plants For Your Interior

This Ph testing of soil post is part 2 of our soil series of posts. Part 1 ‘How to find out my soil type’ discussed ways to discover the characteristics of your soil based on the 6 types of soil you could possibly find in your garden. Finally, Part 3 looks at ways on how to improve your soil for gardening.
Check out our buying guide for the best soil pH testers and find out what is currently on the UK market to help you determine the pH of your soil.
We also found out how to use the ‘soil texture triangle’ to understand the soil texture of our garden soil. Our next step to soil excellence is to undertake the pH testing of soil in our garden.
Knowing the pH (potential Hydrogen) of your soil, (ie. soils alkalinity, neutrality, or acidity) combined with the soil type and texture, will give you a good understanding as to how you are to proceed and improve your soil going forward if you need to, the likelihood is you will need to correct and improve your soil after discovering the pH.
Correcting the pH levels in soil can help a plant thrive, an incorrect pH level can lead to disease or potential death of plants.
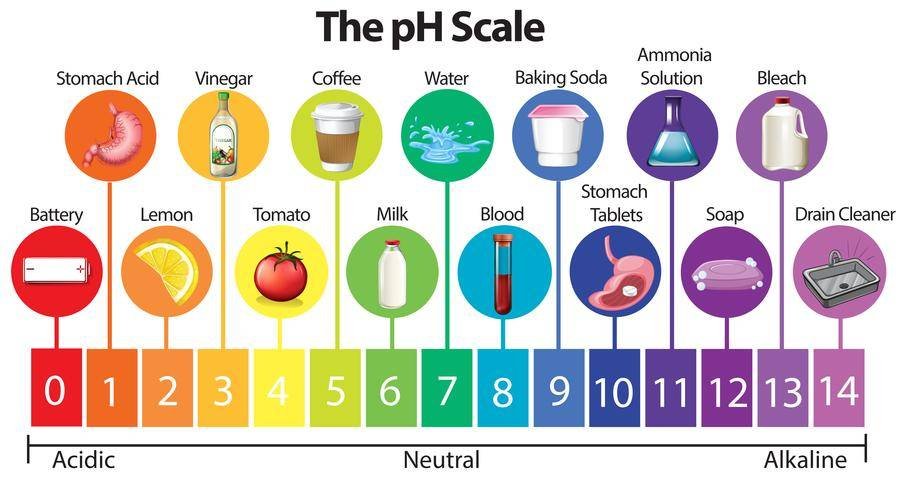
Before proceeding any further with the Ph testing of soil, I should just explain the Ph scale. As explained above, pH in chemistry measures the acidity and alkalinity of different liquids; the pH scale ranges from 0 (red) being very acidic to 14 (very dark purple) which is very alkaline.
Neutral Ph as you may have guessed is 7 (darkish green). However, some graph’s colours may vary but are generally illustrated below.
The numbers and the colour ranges will be explained later in this post, for now just see the image below as an infographic representation of the scale.
So, how do you test the pH level of soil? There are a few ways we can do this with varying degrees of accuracy.
You can of course have full ‘professional testing’ carried out by the Royal Horticultural Society which provides a soil analysis service with a full written RHS report provided. However, most of us would not go down this route initially but would prefer to carry out our own tests primarily ourselves at home.

As you will have no doubt realised if you have followed my methods in part 1 of our series on ‘how to find out my soil type’; you could have different ‘soil types’ in different parts of your garden as ‘soil samples’ need be taken from different locations.
The same applies to pH testing; test soil from various locations and make a note of the locations and pH results.
Method #1
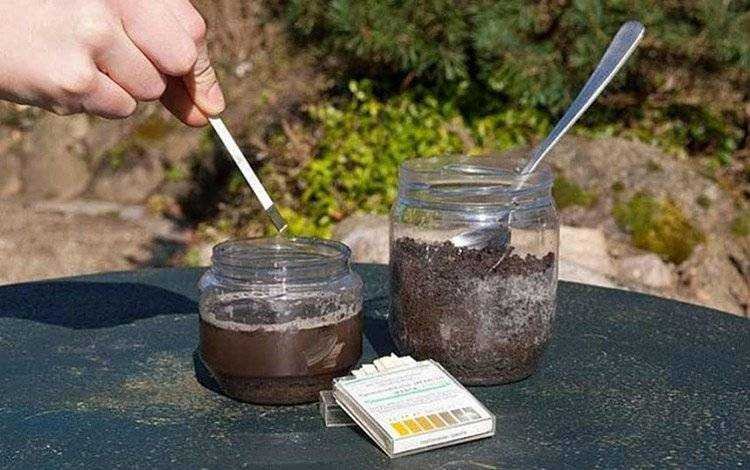
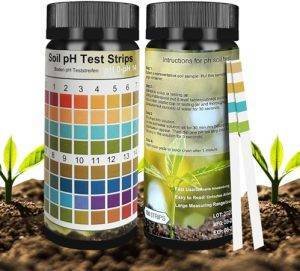
In this method, we use what is known as Ph testing strips to test the pH of the soil. These strips can be purchased at your local garden centre or online through Amazon.
Ph test strips are filter papers which have been soaked in different Ph indicators.
When dipped in a ‘liquid’ the indicator will change colour according to the Ph of the liquid being tested. In our case, it will be soil (or muddy water) that we test.
Follow these steps:
Repeat this exercise for all locations where you want to know the pH of your soil.
Method #2
Our second method uses an electronic soil pH meter.
Our first task when using an electronic pH meter is to calibrate it. Calibration should be undertaken after every pH test.
We calibrate an electronic test meter by using a pH buffer solution powder or liquid which is mixed with distilled or deionised water in a glass or jar (if using powder).
Buffer solutions and or powders come in 3 distinct ranges for calibration. They range from pH 4, (Acidic) pH 6.86, (Neutral) pH 9.18 (Alkaline)

Proceed as follows:
Take note of the reading and remove the probe, turn it off and clean it.
By taking equal samples from multiple locations and mixing them together this way you will ensure you get a good average pH reading across the test area.
Alternatively, you can carry out individual tests from each test hole and take the average across several readings.
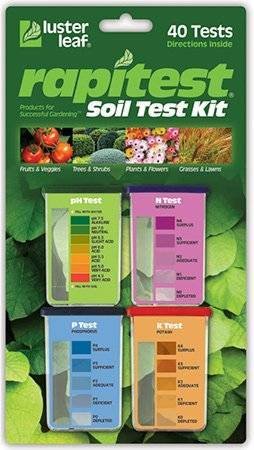
There are a few other very similar methods one can use to test the pH of one’s soil; like the Rapitest soil test kit where you dissolve the manufacturer tablets in your ‘soil ‘sample solution, pour it into a small vessel provided and check the colour against the colours shown on the side of the manufactures packet.
This is a soil test kit that measures more than just the pH, it can also measure the nitrogen, phosphorus, and potash. However, the 2 methods above are the most considered by gardeners wanting to carry out their own pH testing.
The Kitchen Alternative
If you want to try alternative methods, instead of the methods above, perhaps try this kitchen hack using ‘blended red cabbage leaves & distilled water’ (which provides a ‘red cabbage’ juice which has a pH of 7 or neutral).
This hack will give you an indication of the pH of the soil when your soil sample and the cabbage juice are mixed.
In fact, this method of testing pH has quite a wide colour range, indicating almost all the 14 stages of the pH scale; so you should have a good idea of the pH of the soil using this method also.
Look at this video to see what I mean: pH testing of soils – Simple soil testing
Like most things, generally somewhere in the middle is considered okay or neutral. So it is with soil and pH, with most plants liking a neutral or close to neutral pH level to accelerate their growth.
As you can see on the above pH scale 7 is considered neutral, most plants will happily grow in soils that have a pH level of somewhere between 6 and 7.5 this would be considered optimal by most.
Of course, saying what should pH level be in the soil will depend very much on what you intend to grow, as some plants grow better in acidic and or Alkaline soils.
The most accurate way to test soil pH is through laboratory analysis. This involves taking a soil sample and sending it to a laboratory for testing. The laboratory will use specialised equipment and procedures to determine the exact pH level of the soil. However, this method can be time-consuming and expensive.
When soil pH is too high, it becomes alkaline and can affect the availability of nutrients to plants. This is because some essential nutrients become less soluble and are not easily absorbed by plants. As a result, plants may show signs of nutrient deficiencies, such as yellowing leaves or stunted growth.
Acidic soil may show signs such as stunted plant growth, yellowing leaves, and reduced fruit production. This is because the soil’s acidity can limit the availability of essential nutrients such as nitrogen, phosphorus, and potassium. Some plants, however, such as blueberries and azaleas, prefer acidic soil and can grow well in such conditions.
The use of some types of manure, such as horse or cow manure, can lower soil pH over time as they decompose. This is because manure contains organic acids that are released during decomposition, which can contribute to the acidification of soil. However, the extent of pH change depends on the type and amount of manure used, as well as the initial pH of the soil.
After reading pH testing of soils and our first post in the soil series ‘How to find out my soil type’, you should be in a position to see what needs to be done in your garden or allotment to improve your soil, based of course on your own personal growing requirements.
Our final post will look at how best to improve soils based on growing requirements and see what plants grow best in what soils.
You may also look at our FAQ section to seek answers concerning other aspects of your garden and gardening.