![]()
Beautiful Plants For Your Interior
![]()
Beautiful Plants For Your Interior

Organic waste material is a valuable resource that is often just thrown away, and it can be hard to keep up and remove vast amounts of leaves, grass clippings, and vegetable scraps that accumulate in one’s home and garden. Instead of throwing garden waste away or taking it to the local tip, you can use your kitchen scraps in a vermicomposting setup or why not learn how to make a compost heap?
Composting is a great way to make use of your organic material that would otherwise go to waste. Composting is the process by which organic material breaks down over time into a nutrient-rich humus mix, that can be added to your garden soil.
It is extremely helpful for all types of gardens and or allotments because compost provides much-needed nutrients and helps your soil retain water. Composting will also save you money and help you do your bit for the planet.
So, if you are new to gardening and composting particularly this quick ‘Beginners Guide on How to Make a Compost Heap’ will give you everything you need to know about how to build and start your own small compost heap in 7 simple steps and to make sure your first compost pile is a success.
It is not always easy to find the perfect spot, but do not worry too much, you can make a compost heap in just about any area of your garden or allotment. If you can find a place that has good drainage I prefer a location that has a little shade but also catches the sun for at least a few hours of the day.
Tip: Try and be sure that your site is in an area where there are no trees or shrubs nearby because they will rob nitrogen from the soil.
One of the most important things to remember with a compost heap is maintaining ‘airflow’ so it does not get too hot and start to smell. Too much heat will also kill all the good bacteria and microbes that help break down the organic material, and you may have to start over from scratch.
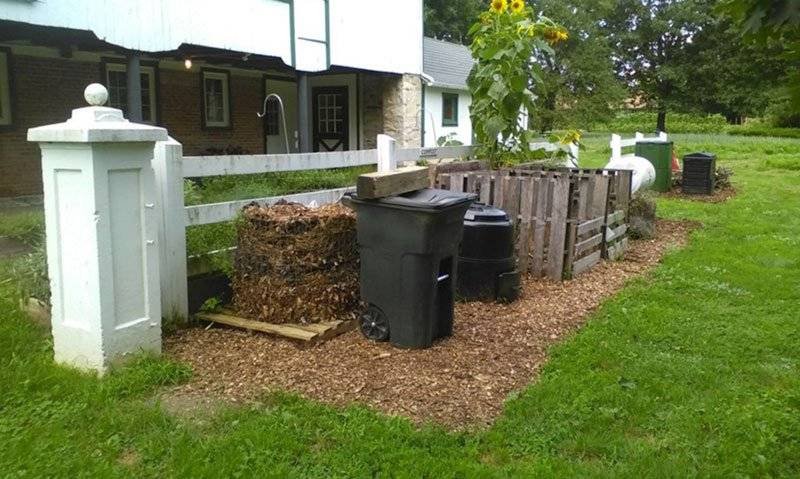
Your next consideration is to think about what kind of ‘compost bin’ you want to buy or make. Luckily, there are loads of different designs out there. I like the ‘flat pack’ type, one of the key benefits of a flat pack is that you can ‘take it down’ and move it to any part of the garden should the need arise.
There are plenty of other bins you can buy, plastic models are popular, but I don’t feel that they look as good, you just have this weird ugly-looking plastic tower in your garden. I prefer the more ‘rustic look’ of wood.
Flat-pack compost bins aren’t really going to cost an arm and a leg, and they are going to last a fair few years and give you a lot of compost. They are simple to put together and easy to access once you start composting.
Our next step in ‘How to Make a Compost Heap’ is what you need to compost. Knowing what to compost is also especially important, things which you can easily source and that are important to your overall composting success.
I will keep it really simple because I think quite a few people make it way too complicated, but there are basically ‘greens’ and ‘browns’. The organic waste material you add to a compost heap contains carbon and nitrogen. The ratio of carbon to nitrogen determines whether we label it a ‘green’ or a ‘brown’.
Organic green materials that have a relatively high nitrogen content and a carbon-to-nitrogen ratio below 30:1 are called ‘greens’. Organic materials with a lower nitrogen content (in other words a higher carbon-to-nitrogen ratio) are called ‘browns’.
So, greens stand for only things that are nitrogen-rich, like cow manure, which is a ‘green’ even though they’re brown but basically everything that is living is a ‘nitrogen’ so it’s going to be a ‘green’ material. Things like lawn clipping, seaweed, spent brewery grains, coffee grounds, and cow or horse manure are green.
Everything that’s dead is ‘brown’ and brown is full of ‘carbon’ so things like fallen autumn leaves, shredded paper, newspaper, cardboard, sawdust and wood chippings are ‘brown’ materials.
Green’s
Brown’s
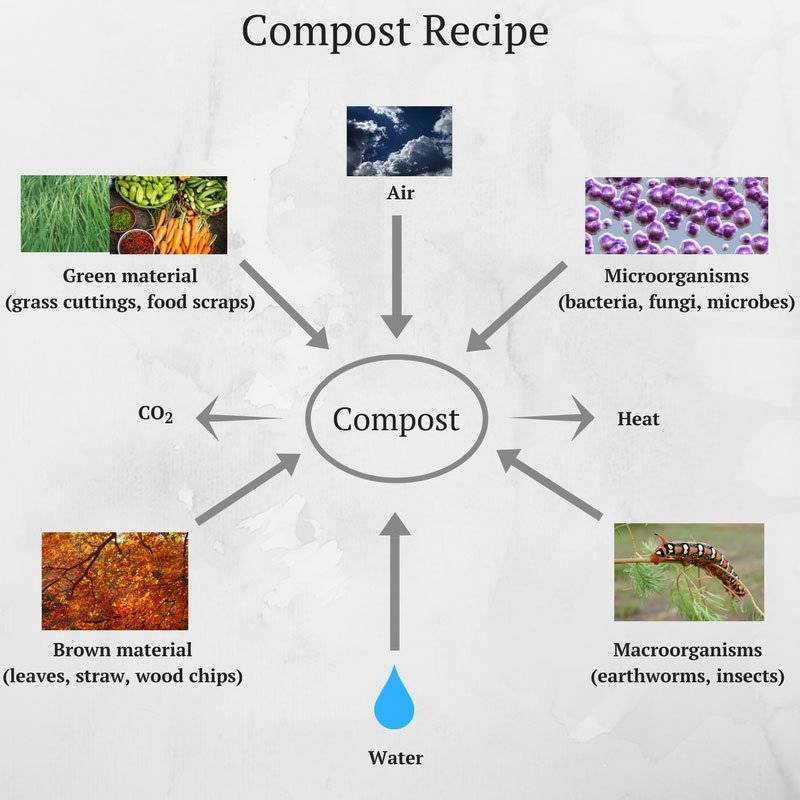
Follow these simple guidelines for the perfect composting recipe.
There are 4 main ingredients for good compost, greens, browns, air, and moisture. These 4 need to be balanced correctly for the best results.
As we have discovered above the ingredients you add to a heap contain carbon and nitrogen, (Greens & Browns).
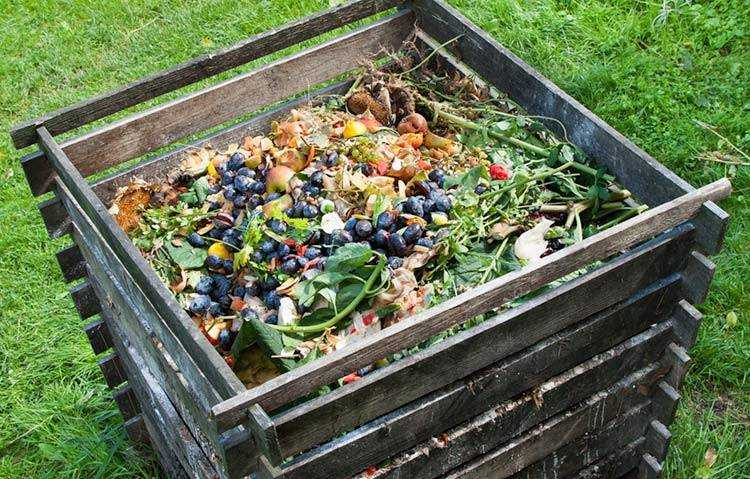
Once you have placed your bin, start by placing your first layer (Green) of organic materials on the bare soil. This will allow ‘earthworms’ to burrow through the soil and help to ‘aerate’ it.
Start your heap by making this nice green layer, one or two buckets of say grass clippings, followed by your brown layer.
A good ratio to start off your compost heap is to aim for 2-3 times more brown materials than greens so using this above example add 2 to 6 buckets of brown.
If you add too much green it will result in a soggy, smelly mess. So never add lots of grass clippings in one go, as it will just form a slimy matted layer. Continue adding greens and browns in layers as you go.
Air is vital to the composting process, so it is important to mix the waste matter together after a month or two once layered.
By turning or remixing the compost more air is introduced, which speeds up decomposition.
Note: Never squash your organic matter down tightly.
The fourth final and vital ingredient is water, preferably rainwater but tap-filtered drinking quality should do fine too.
If you stockpile brown materials, you will need to water the pile to get things going when first layering browns in. Water your compost heap where necessary to produce a moist (but not soggy) mixture.
A good compost heap has a slightly sweet compost smell. If it smells sour or rotten then it either has too many greens or is too wet. In either case, the ‘remedy’ is to mix more ‘brown’ materials into your compost heap to compensate.
With the correct moisture and air mix, you are giving the microbes that decompose the materials the best conditions to work in, which in turn speeds up the decomposition.
If you follow this recipe in anything from 6-12 months you should get a fine, crumbly-textured compost. Any remaining large bits can be sieved out and put into the next compost heap you build.
Let us just imagine that your compost pile is finished. I recommend adding a sort of ‘cover’ over the top. (unless you have a compost bin with a roof/lid) One can use ‘cardboard’ which is quite suitable for the covering of your compost bin/pile in this instance.
What I suggest to do is just put something over the top of your pile which will repel a lot of the water and it is just overall going to help the composting process.
The reason why I recommend doing this is that in the UK the weather can be quite often wet and if you have a nice compost pile which becomes sodden with water it is not going to be highly effective.
That’s all you need to really know to just get started creating your own compost.
Yes, you can put weeds in your compost heap, but it is recommended to avoid putting weeds that have gone to seed, as the seeds can survive the composting process and spread throughout your garden. Additionally, it is recommended to avoid putting weeds that have been treated with herbicides, as the chemicals can kill the beneficial microorganisms in your compost heap.
When your compost is ready, it should be dark, crumbly, and have an earthy smell. You should not be able to recognise any of the original materials used in the compost heap. To test if your compost is ready, take a handful and squeeze it. If it stays together and feels moist, it is ready to use.
You can use your finished compost as a soil amendment, fertiliser, or mulch in your garden. It can help improve soil structure, retain moisture, and provide nutrients to your plants. Additionally, you can use it to top-dress your lawn or as a potting mix for indoor plants.
Composting is a great way to use up all those scraps from your kitchen and garden. It will help you reduce waste and save money on buying fertiliser for your garden.
The best part about composting is that it is easy to do! You can make a compost heap in just a few minutes with the right organic matter, which is most likely already sitting around in your kitchen or garden. All you need to do is layer them together into a compost pile as described above.
So now you know how to make a compost heap. Your garden will be grateful for the rich, natural fertiliser that can easily be made with very little effort on your part.
It is important to take time and care of your flowers, vegetables and plants, so don’t forget this simple but important aspect (composting) in your gardening workflow.