![]()
Beautiful Plants For Your Interior
![]()
Beautiful Plants For Your Interior

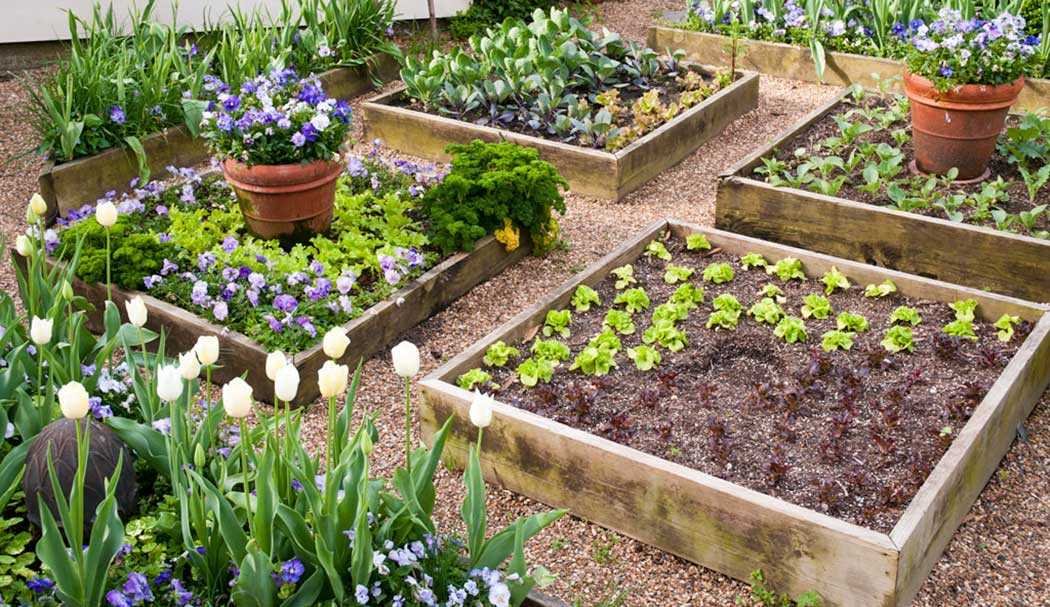
Creating raised beds for gardens and allotments are a great way to grow all sorts of plants, and they’re especially popular for growing fruit.
Raised beds drain well generally and you can use them to introduce different types of soil into your garden and or allotment if you want!
Ensuring the correct raised bed depth also makes gardening easier for the elderly or those with mobility restrictions – as bending can be virtually eliminated when gardening in a raised bed; it can be easy enough just to manage standing up and or working from a gardening seat on wheels or your own wheelchair.
Because you can grow most things in raised beds, they are one of the best ways to grow your own plants.
Why Not Try:

Raised beds are a great way to start gardening. However, they can also be used for other things.
They help to:
Building a raised bed for the garden during the winter months is an excellent time of the year to make one’s garden more suited to your own planting and growing needs come spring.
Winter is the time of year most UK gardeners find the time to erect their beds. However, this may well depend on where you live and your own specific soil conditions.
Perhaps waterlogging is common during wet winters or the ground is susceptible to freezing where you are, if so then late summer or early autumn is also a suitable time. But of course, there is no hard and fast rule as to when they should be built so do not worry.
Building raised beds can be a surprisingly easy and straightforward project, but for those of you who are interested in taking on the task, there is some advice that needs to be heeded.

Stone, concrete blocks and or bricks are some of the most expensive materials you can purchase for most projects in the home. You will also more than likely require a skilled contractor for the construction aspect, remembering that ‘footings’ are always required due to their weighty properties.
However, on the positive side, stone, bricks and concrete blocks provide you with an opportunity for creativity. Bricks can be customized with curves and or colour so that your house and garden has a character all its own.
Wood is a very versatile material to use for your raised bed project. Buy pressure-treated wood if possible. Pressure-treated wood is best as you will get some guarantee with respect to its longevity (normally 5-15 years) against rot and insect infestation.
However, as with all treated woods and to prevent the preservative from leaching into the soil and having an adverse effect on any plant and microbe life below ground level, line any soil-exposed timbers with black plastic sheeting before burying them.
You can also use untreated wood if needed, but this is not recommended as this will undoubtedly cause problems in the not-too-distant future.
Railway sleepers had been used for years to make raised beds for gardens. However, recent studies show that prolonged daily skin contact with creosote-treated railway sleepers poses a significant health risk and therefore is no longer permitted to be used.
If you already have raised beds made from old railway sleepers that you ‘touch’ often when gardening, then protective clothing should be worn, certainly gloves and possibly even a mask.
For new beds, use ‘untreated’ hardwood timbers and treat them with the appropriate preservatives or alternatively sleepers that have used other wood preservative-treated coatings and no creosote.
It should be noted that large timbers used to make your beds will require a lot of heavy lifting.
Paving slabs are another possible option. Paving slabs are often laid on their side and buried to a depth of at least 8in (20cm), with only 16in (40cm) remaining above the ground. This is necessary for stability, as these slabs may move over time due to changes in temperature and or slight ground movement.
To provide extra support against movement during the construction process, 2 x 12in (30 cm) deep concrete ‘haunchings’ can be installed along either side of the paving slabs or a single haunching and metal plates/strips can be fixed between each slab to hold them together as an alternative method.
The length of the ‘retaining stakes’ sunk into the soil will depend on how high and wide the bed needs to be. For a small bed, 2in x 2in (50mm x 50 mm) timbers should suffice at every corner and at 5 ft (1.5 mtrs) centres. Stakes should be sunk (12-18in) 30-45cm into the soil, plus adding your bed height.
Now you have your raised bed in place it’s time to fill the bed. As we know a good foundation in almost everything we do is key to success. It’s no different when the time comes to fill your bed.
We need to now start cultivating and enriching the underlying soil with organic matter. It is very important, not just for sustainability but also for healthy plant growth!
Beds constructed on free-draining soils will drain naturally, and permit deep rooting, so no problems should be foreseen going forward.
Raised beds are perfect for gardens that have poor drainage or have a solid base such as concrete or paving. To make sure water drains properly from these raised beds be sure to add open-textured soil with sand if necessary.
As mentioned above in the ‘construction’ phase, make holes in the sides of your raised beds so that excess water can escape easily during heavy water-logging rain.
The right soil can be the difference between a flourishing bed and one that is barely hanging on. It’s important to know what plants you intend to grow before choosing your top layer of soil, as each type of plant has different needs in terms of soil, water retention and drainage.
When adding soil start with a depth of around 10in (25cm), this is deep enough for most vegetables, but if it rains frequently as is often the case in the UK, use a 6in (15cm) layer of sharp sand beneath your prefered topsoil, this will allow excess moisture to drain freely without suffocating plant roots.
Raised beds on impermeable surfaces, especially shallow ones, are a lot like pots, they need special care and attention. This type of bed will dry out quickly if you don’t take care of it by watering regularly and or replacing the soil every few years when the bed’s drainage becomes impaired.
There are many ways to make a garden bed but for beds deeper than 20in (50cm). One of the best methods is to remove the underlying topsoil from the chosen area and replace it with subsoil, builder’s rubble or old inverted turves.
After this process has been completed, you will need to replace the topsoil you have removed ensuring it is thoroughly mixed with rich organic matter, like well-rotted compost or manure before finally re-filling the bed in several layers, finally stopping at the desired level. Ensure you firm each layer ‘down’ to avoid any settling later.
One of the best ways to make a raised bed is by removing the topsoil as advised. However, if the topsoil is not suitable for the ‘plants’ you intend to grow in your new bed, then leave the soil in place and simply break it up well, ensuring it is nice loose and crumbly. Then simply fill your bed with the ‘suitable’ topsoil of your choice.
Small raised garden beds can be ‘filled’ using John Innes No 2 or No3, (as advised by a leading horticultural society) compost, but larger beds need more variety and you should try combining 3 parts organic matter like hay with 2 parts sharp sand to 7 parts topsoil for an even better mix.

The best way of planting rhododendrons and or azaleas is by building the bed deep enough that it can grow a good root system. Look to achieve the minimum rooting depth of around 18in (45cm).
If you are using bricks or stones make sure they’re lined with ‘polythene’ so your plants won’t be contaminated by any ‘lime’ in the mortar, as their root system expands.
A good soil mix for planting an azalea or any plants from the Ericaceae family requires soil that consists of 3 parts neutral (pH7) topsoil, 5 parts ericaceous compost and 2 parts composted bark; finally, as a mulch add some acid leaf mould or composted pine or spruce needles, if you can get them from a local specialist nursery.
Given the importance of soil for plants, it is important to make sure that your Alpine plant has enough space and depth. For this, you should provide 18in (45cm) rooting depth which helps prevent ‘rapid’ drying out even on hot days.
A suitable soil mix would consist of 4 parts horticultural grit, 2 parts leaf mould or fine-grade chipped bark and 2 parts normal topsoil.
To provide an optimum environment for bulbs, plan to dig down around 12in (30 cm), this will give the bulbs a good recovery period from a compost mix that should drain freely and dry out in the summer months.
Probably the best soil mix would be 3 parts topsoil, 1 part sharp sand or horticultural grit and 1 part fine chipped bark.
To avoid pests like squirrels and other rodents from potentially destroying your bulb beds, place a layer of fine mesh wire netting just beneath the surface which should deter them but still allow natural soil drainage as well as growth.
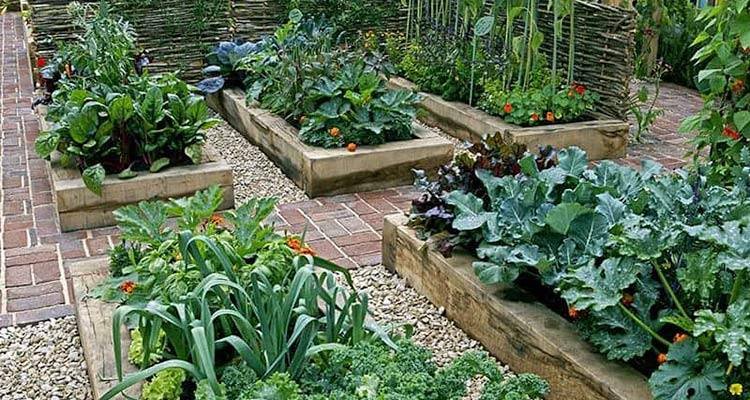
Growing in raised beds brings a multitude of benefits to vegetable growers.
Growing vegetables in raised beds is a great way to ensure that they grow uniformly by growing in blocks and by suppressing weeds more effectively. Raised beds can be more easily covered than in a larger vegetable patch or allotment.
You can also enjoy the benefits of early-season starts as the beds warm up faster in the spring, this means you can harvest sooner too.
Rotations are simple to practice when your garden is made up of a series of small beds, rather than one large plot.
Plants will grow better when they are grown in the right environment. The best way to do this for a vegetable bed is by orienting beds north-to-south so that all plants get an equal amount of sunlight levels and there’s no one corner with less sun than anywhere else.
Finally (and maybe most importantly), fertiliser is concentrated where it’s needed rather than being wasted on pathways that lead away from your plants – thus improving yields and reducing costs.
Mulch after planting: Mulch is great for your raised beds, it will help keep the soil moist and reduce weeding. Mulching in between plants with straw or grass clippings can also provide a natural fertiliser that releases nutrients slowly over time to feed your plant’s roots as they grow.
Mulch does three important things: It reduces weeds from growing; provides an easy organic material for making compost; and protects against water loss due to evaporation by keeping the surface of the ground cool.
Bury any turves removed in making your beds. This will enrich the soil as it decomposes over time.
There’s nothing wrong with building a raised bed on top of hard surfaces like concrete. A simple rule to follow when building raised beds, it is important to make sure that they are deep enough for plants to grow properly.
If the bed is not at least 18 in (45cm) deep then you will have a hard time keeping your plants watered and healthy. For best results, try making them 2 ft (60cm) deep so that roots can go down as far as possible before reaching the concrete or something even more solid than soil!
Raised bed gardening is great because it’s so easy to maintain and the garden soil results from it can be absolutely perfect. All you have to do is fill the raised beds with topsoil and add some compost for that perfect soil mixture.
However, it also helps if you build your beds in a way that allows you to access all areas of the garden without having to stand on them or walk around them like obstacles course!
If after building your raised beds, an area becomes difficult to access when standing outside of it consider installing ‘patio pavers’ at strategic points across the beds which will allow you to stand inside the bed, or easily cross over to the other side while avoiding damaging any plants.
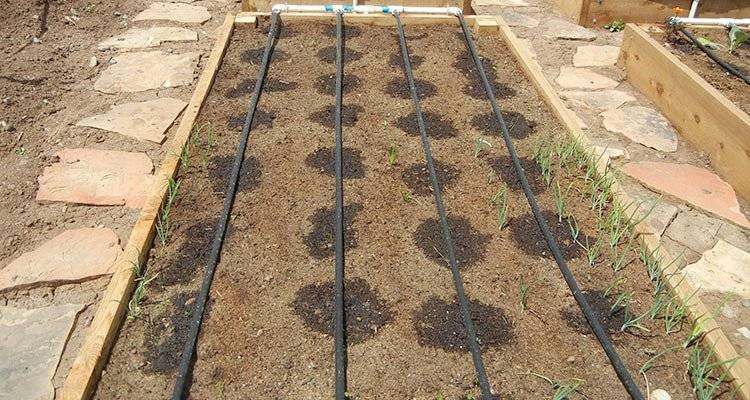
The lack of water due to drought and or neglect can be very difficult on plants, but some have it worse than others. Raised beds are more susceptible to depletion and damage due to improved drainage; make sure you’re keeping an eye out for their watering needs!
Modern wood treatments do not contain the potentially harmful carcinogenic substances that were once so commonplace in paint, creosote and varnish, making them a safe choice for use.
However, if you have any doubts about whether or not to treat your wooden beds with these types of products, lining your bed on the inside with polythene, will prevent potentially harmful substances ‘leaching out’ from the wood and contaminating the soil, polythene will act as an impermeable barrier.
New railway sleepers may contain a dangerous toxic chemical that should not be used where skin contact is possible. However, older sleepers are thought to have lost their toxicity and can therefore safely be touched without fear of adverse effects on the body. But always try and get some sort of confirmation on sleeper’s age and origin.
Consider factors such as sunlight exposure, water accessibility, and soil quality. The bed should be placed in an area that receives at least six hours of sunlight per day, has access to a water source, and is on level ground with good soil drainage. Avoid areas with poor soil quality, excessive shade, or where water tends to pool
Raised garden beds provide improved soil drainage, better soil control, reduced soil erosion, easier maintenance and harvesting, and better pest control. They offer an efficient and effective way to grow a variety of plants in a controlled environment.
The disadvantages of using a raised garden bed are that they can be more expensive than traditional gardens, require more soil to fill, and may require additional watering due to their improved drainage. They also require regular maintenance, such as adding compost and fertiliser, to maintain healthy soil. Additionally, the materials used to construct the bed may not be sustainable or environmentally friendly.
The ideal size for a raised garden bed depends on the available space, the plants to be grown, and the gardener’s preferences. However, the bed should be no wider than 4ft (1.3m) to allow easy access to all sides and should be at least 6in (15cm) deep to provide sufficient root space. The length of the bed can vary depending on the space available.
So now you know how to create, construct, fill and plant your own raised garden beds. If you’ve followed along with our guide from the beginning, we hope that by now it should be clear why this is a great way of gardening for beginners or those just starting out with their first allotment or community garden project.
You can even use these techniques in containers on patios or balconies if space is limited! But don’t forget one final step; keep an eye out for pests such as slugs so they don’t destroy all of your hard work. Now get started and build yourself, some beautiful and productive raised bed gardens!
If this article has helped you in any way, please consider sharing it amongst your family and garden-loving friends. Why not get them to check out our Facebook page?
Finally, you can always pop over to our FAQ page to find out more about raised beds for gardens and a whole host of other answers to your gardening questions and queries.